With spring comes renewal, and in that light the original article for today’s post was delayed due to both the holiday and the need to do a bit more data collecting to make sure it was up to snuff. In the place of ‘The annuals you thought you knew’ we have today’s topic. Today I’ve got a photographic article covering how to turn under a green manure crop. For those of you who have been to my booth at Urban Farm Day or at the Neighborhood Grange meetings, you will recall I spoke on the use of Mustard as a ‘green manure’. For those unfamiliar to the term a Green Manure is sometimes called a cover crop, it’s role is to hold the soil during a period in which you are not actively producing a crop. Cover crops are often turned under at the start of a growing season to return nutrients to the soil. Common cover crops include Winter Rye, Clover, Mustard, Vetch, Peas, Beans and, any ‘annual’ production crop. With all that said here is the photo montage of me turning under my Red Giant Mustard crop, as it had all begun to bolt.

Step 1: Determine if your cover crop is at the end of its usefulness, as seen here all of these mustard plants are bolting or going to seed which is a process one can’t stop once it has begun.

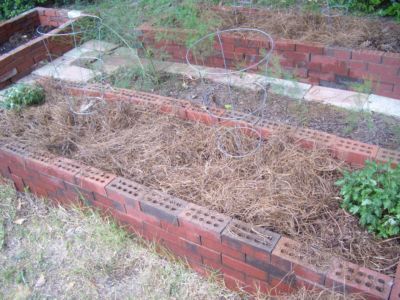
Step 2: Pull crops up if possible, if not simply use tiller to turn crops under. If your pulling the crops like I did here note that the upper six inches of soil was dug up after the pulling and placed in a wheel barrel temporarily.


Step 4: Oh the Humanity! Murdered Mustard Greens everywhere! Seriously between the trenching shovel and edging tool these mustard greens are chopped pretty good, they’ll decompose fairly quickly.


Step 8: Apply a mulch of some sort and allow the bets to sit undisturbed for at least 24 hours before planting. A high nitrogen water-soluble fertilizer or Lawn dethatching chemical solution can be used to accelerate decomposition but neither is greatly necessary.
This seems like a bit of work, but it is worth it, as the effect of turning the soil in this way returns nutrients to the soil also it has the effect of saving a bunch in fertilizers and soil amendments. In my case the mustard is perfectly edible and serves as a winter food crop until it becomes time to convert it in the way shown above. For you grangers out there the bed pictures is one of my three high production beds two of three of which are a foot tall overall and nine feet long by three feet wide. Since all of the high production beds are raised they all have heavily enriched soil that is 90% compost by volume. The advantage is that there is quite a lot of produce for a very small area the problem is that they are some times difficult to keep watered and I have to re-enrich them between crops. However the ecological foot print of the beds is tiny, virtually no fertilizer is ever used nor is any pesticides or herbicides as the height keeps most weeds out and the plants largely can defend themselves.
I hope this photo-post was useful to all of you if you like the idea of this sort of post let me know and I can do more, if you have any questions or comments feel free to ask. Next week LITFM will actually cover “The annuals you thought you knew”. Thank you for reading.
No comments:
Post a Comment